
Fuel Line w/dampener replacement...no more gas leak...


Thread Starter
Senior Member
Joined: 08-18-2007
Posts: 602
From: Warrington PA
Fuel Line w/dampener replacement...no more gas leak...
My gas leak is now corrected as I changed out the fuel line that contains the pulse dampener and schrader valve (which was leaking) with a new unit. Took some pics with the tools needed to do the job. This job can be completed within a 1/2 hr. tops and that's with letting the fuel run out of the system.
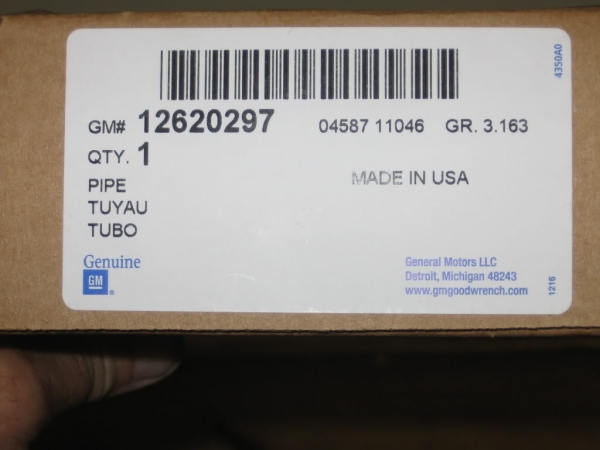
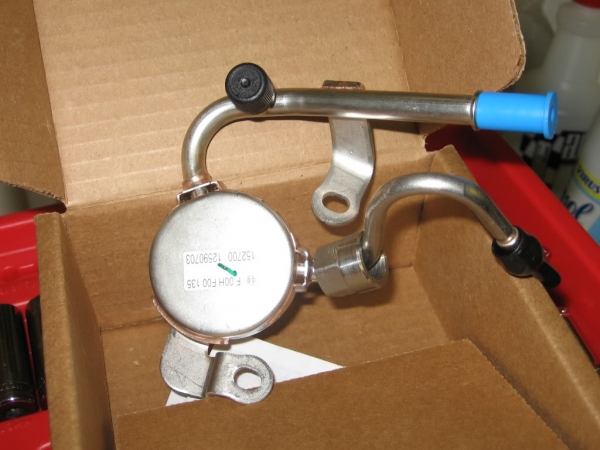
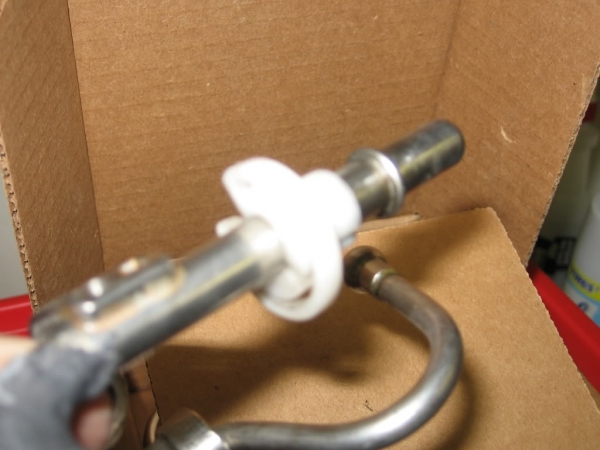
Take note, part # on top of the pulse dampener is not a valid # anymore, even though the new part still has that # on it. The new part# is the one in the pic below.
1-start engine and then pull fuse #13 out of the fuse box in the engine compartment. will take 5 minutes or longer for fuel to run out of the line. restart a few times and when the engine doesn't start, you are ready to go. I did not disconnect the battery, but that is not to say that you should not, that decision is up to you.
2-remove the airbox from the engine. you do not need to remove the IC pipe, it is not in your way.
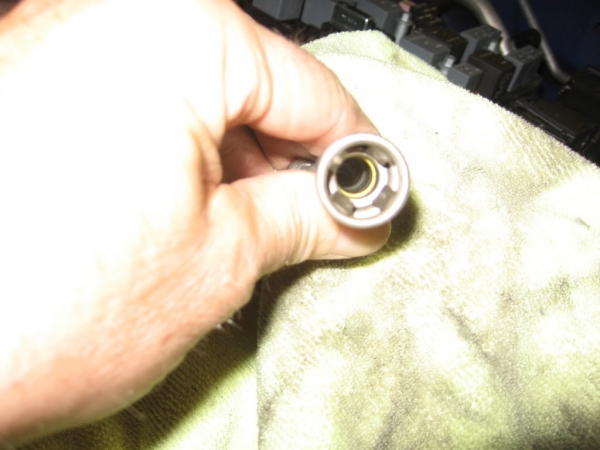
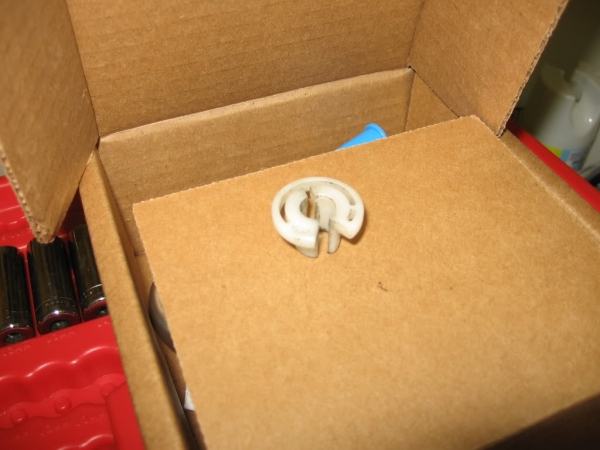
3-undo the clamp on the fuel line,(it just lifts up and unclips from the line) this is also the line that you will need a "fuel line removal tool" (3/8") to disconnect this line, as there are 4 tabs inside the line and no other way to pull the line apart without damaging that part of the line. I did this as the last step with everything disconnected, that way you can hold the line and pull with one hand, while holding the removal tool,(which is plastic) and pushing the tool into the fuel line with your other hand and pull the line to remove. to put the new line on insert into the main fuel line and it snaps into place, and then reclamp with the clamp you removed earlier.
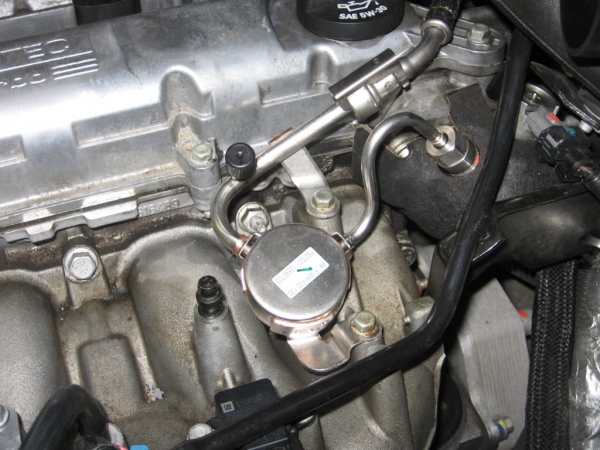
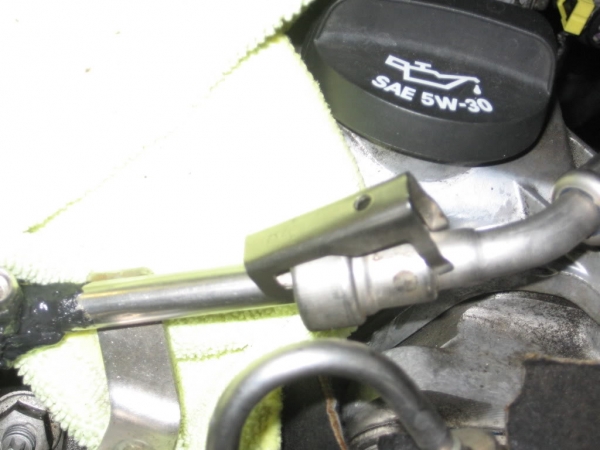
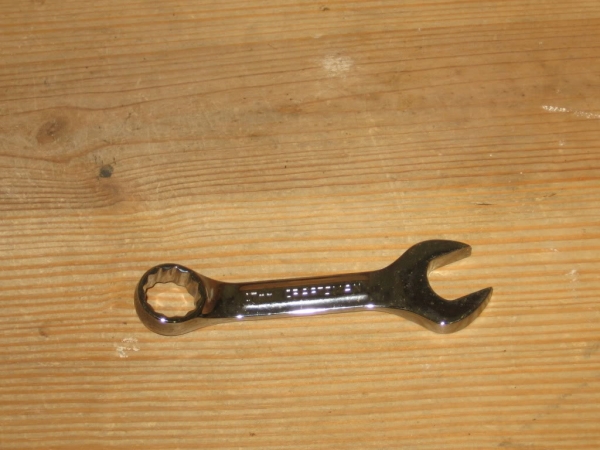
4-undo the large nut on the other side of the fuel line (17mm), you do not need a flared wrench to do this, you need to move the plastic line out of the holder so you can get a "shorty" open end 17mm wrench in there to loosen that nut. you can only loosen the nut a bit because of the space limitations in that area, but then reverse the wrench to the other side so your opening lines up squarely with the nut to disconnect, a few times doing this and it is loose. I recommend using a large plastic type cap to cover this part of the fuel line that goes into the engine to prevent any foreign material from entering the system.
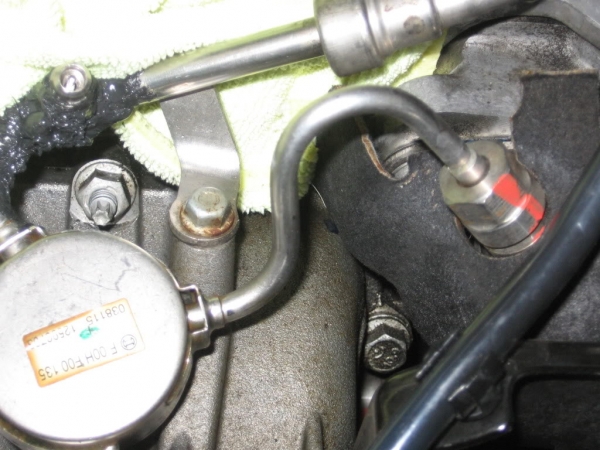
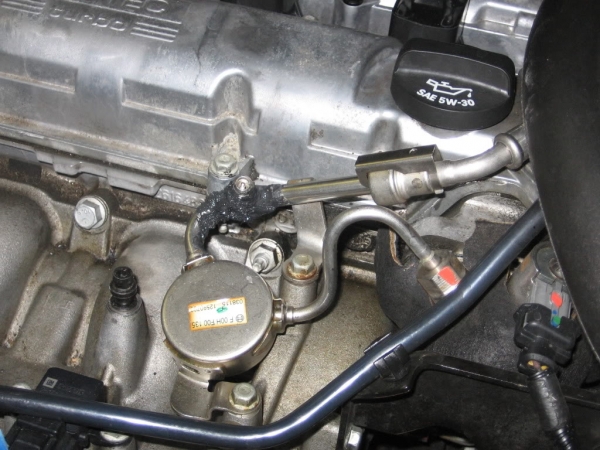
5-undo the 2 10mm bolts around the pulse dampener and refer to #3 and you are finished. yes there is a small amount of fuel left in the line, but not much at all, just lay some rags around the area.
6-to install the new line just reverse the procedure, be sure to just start the 2 10mm bolts, do not tighten yet and then connect the line with the 17mm nut and tighten that down, as your top side of the line is already inserted into the fuel line, and then snug down the 2 10mm bolts and you have completed the job.
7-insert fuse back into the fuse box, start engine and check for leaks.
8-hope this will help anyone who need to perform this job.
Take note, part # on top of the pulse dampener is not a valid # anymore, even though the new part still has that # on it. The new part# is the one in the pic below.
1-start engine and then pull fuse #13 out of the fuse box in the engine compartment. will take 5 minutes or longer for fuel to run out of the line. restart a few times and when the engine doesn't start, you are ready to go. I did not disconnect the battery, but that is not to say that you should not, that decision is up to you.
2-remove the airbox from the engine. you do not need to remove the IC pipe, it is not in your way.
3-undo the clamp on the fuel line,(it just lifts up and unclips from the line) this is also the line that you will need a "fuel line removal tool" (3/8") to disconnect this line, as there are 4 tabs inside the line and no other way to pull the line apart without damaging that part of the line. I did this as the last step with everything disconnected, that way you can hold the line and pull with one hand, while holding the removal tool,(which is plastic) and pushing the tool into the fuel line with your other hand and pull the line to remove. to put the new line on insert into the main fuel line and it snaps into place, and then reclamp with the clamp you removed earlier.
4-undo the large nut on the other side of the fuel line (17mm), you do not need a flared wrench to do this, you need to move the plastic line out of the holder so you can get a "shorty" open end 17mm wrench in there to loosen that nut. you can only loosen the nut a bit because of the space limitations in that area, but then reverse the wrench to the other side so your opening lines up squarely with the nut to disconnect, a few times doing this and it is loose. I recommend using a large plastic type cap to cover this part of the fuel line that goes into the engine to prevent any foreign material from entering the system.
5-undo the 2 10mm bolts around the pulse dampener and refer to #3 and you are finished. yes there is a small amount of fuel left in the line, but not much at all, just lay some rags around the area.
6-to install the new line just reverse the procedure, be sure to just start the 2 10mm bolts, do not tighten yet and then connect the line with the 17mm nut and tighten that down, as your top side of the line is already inserted into the fuel line, and then snug down the 2 10mm bolts and you have completed the job.
7-insert fuse back into the fuse box, start engine and check for leaks.
8-hope this will help anyone who need to perform this job.
Last edited by ChevyMgr; May 30, 2011 at 10:21 AM. Reason: resized pics to site guidelines

Thread Starter
Senior Member
Joined: 08-18-2007
Posts: 602
From: Warrington PA
It appears that the valve has a removable core, but the tool I had to tighten it with was to small, as the valve is larger than a tire valve. And if I bent the tube, I would have really been screwed. So it was easier to replace the part and get the SS back in service without any more leaking. When I remove the LM from the old line, I will check into that further, and repair as needed to keep as a spare.
I may have the oil leak, but it may also be road grime from the 73,000 miles plus of highway driving. The cam cover is dry and I do not feel any wetness around the fuel pump area, but if so, that job is for another day....

Thread
Thread Starter
Forum
Replies
Last Post