
Stock amplifier wiring chart
 08-09-2007, 12:32 AM
#11
Senior Member
Thread Starter

Join Date: 12-18-2005
Location: Middle Village, NY
Posts: 1,791
Quick update on old post. I just found out that it is very hard to run new wires to the door speakers. This is because GM used buss connectors inside the rubber sleeve. It makes it easier to replace the door-just unplug it. But the connector covers the speaker, windows, door locks, etc. That is why I am going to the amp. I will connect the input and output, then use the wires that are already by the head unit and run them to the speaker outputs of the radio. If I decide to use a separate amp in the back, then I will just tap into the output wires that come from the stock amp and go to each speaker.
But first I have to wait for my new GMOS3 LAM to arrive. Until then, no music for me (just the purr of the Ecotech)
But first I have to wait for my new GMOS3 LAM to arrive. Until then, no music for me (just the purr of the Ecotech)
 10-04-2007, 07:22 PM
#12

Join Date: 10-22-2006
Location: St. Petersburg, Florida
Posts: 9
I started a new thread on how I added an amp and subs to the stock head without changeing the exisiting systemhttps://www.chevyhhr.net/forums/show...709#post201709


 11-14-2011, 02:23 PM
#18
Senior Member

Join Date: 10-06-2011
Location: Mesa, AZ
Posts: 1,150
On my harness I found that the Tan used for the Left Front is paired (twisted and taped together) with the Dark Green.
I took picks of all three harness plugs and the paired wires and will post them up today or tomorrow.
11-17-2011, 02:08 AM
#19
Senior Member
Join Date: 10-06-2011
Location: Mesa, AZ
Posts: 1,150
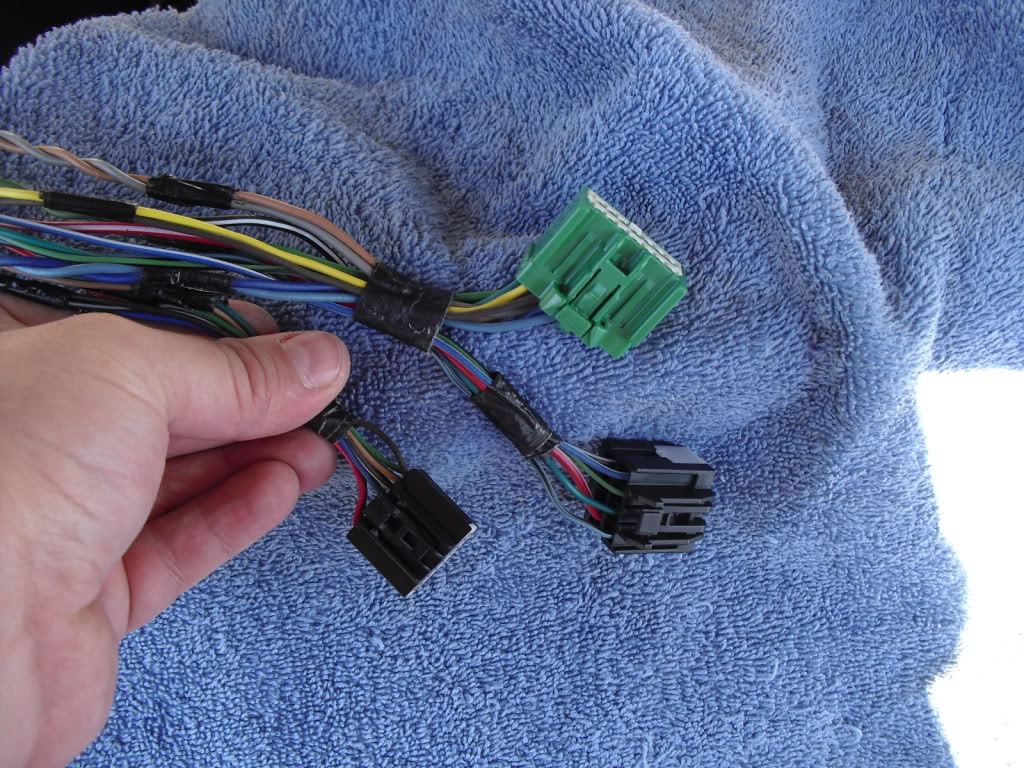
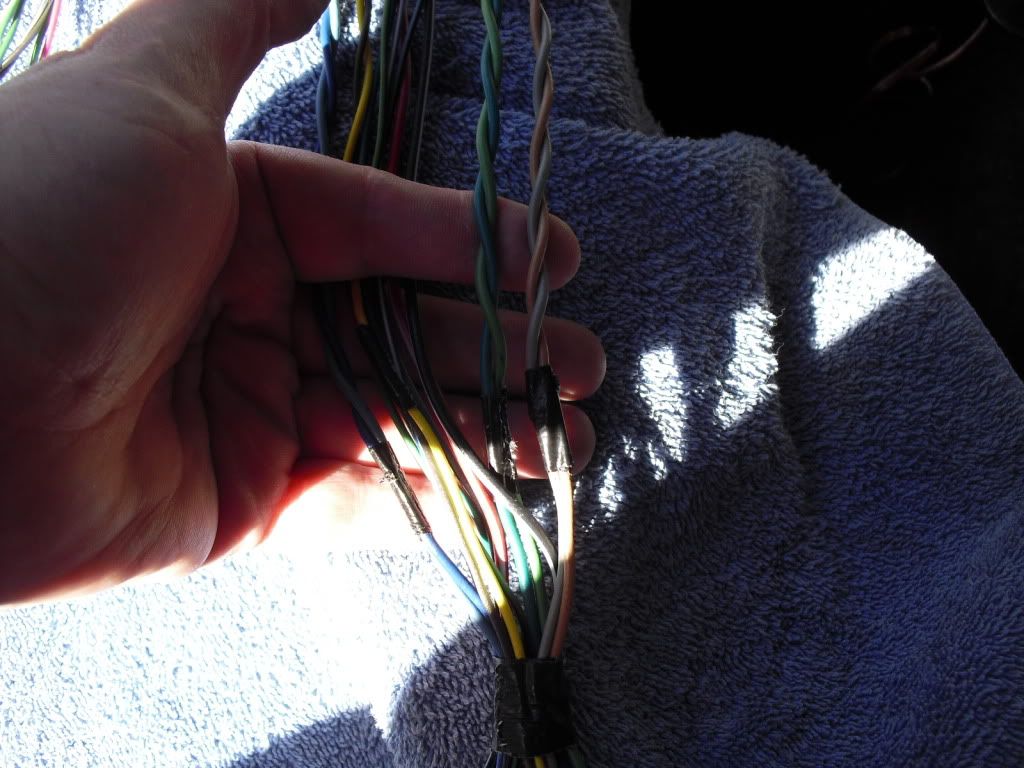
Pics of the harness for the amp.
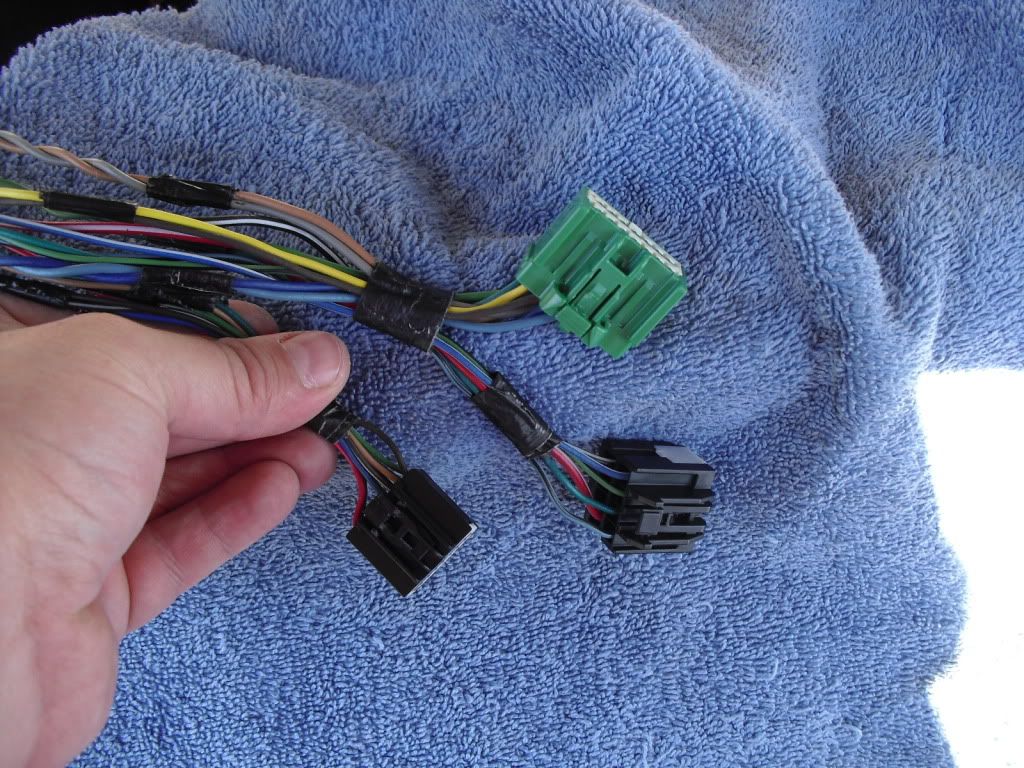
This is all three plug-ins/connecters for the factory amp. The one in my hand is the RCA and remote on plug. The green one has the front and rear speaker wires and the bigger black plug has the pwr, ground, and sub speaker wires.
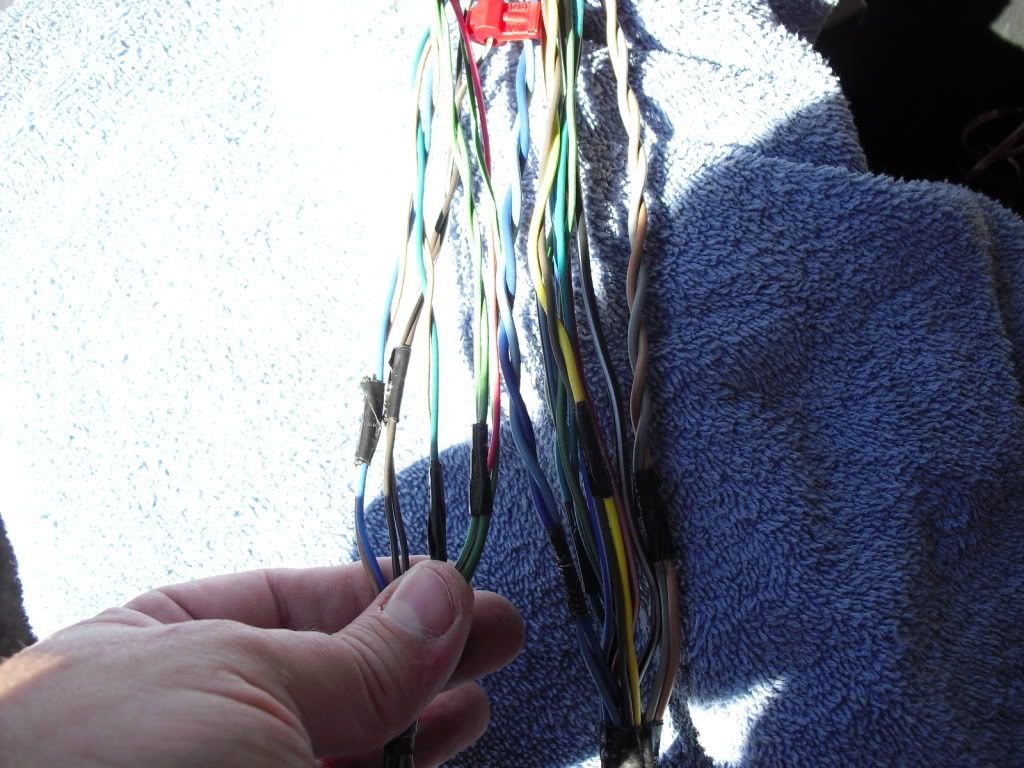
This one is all wires spread out a bit. Again in my hand are the low level RCA wires TO the amp.
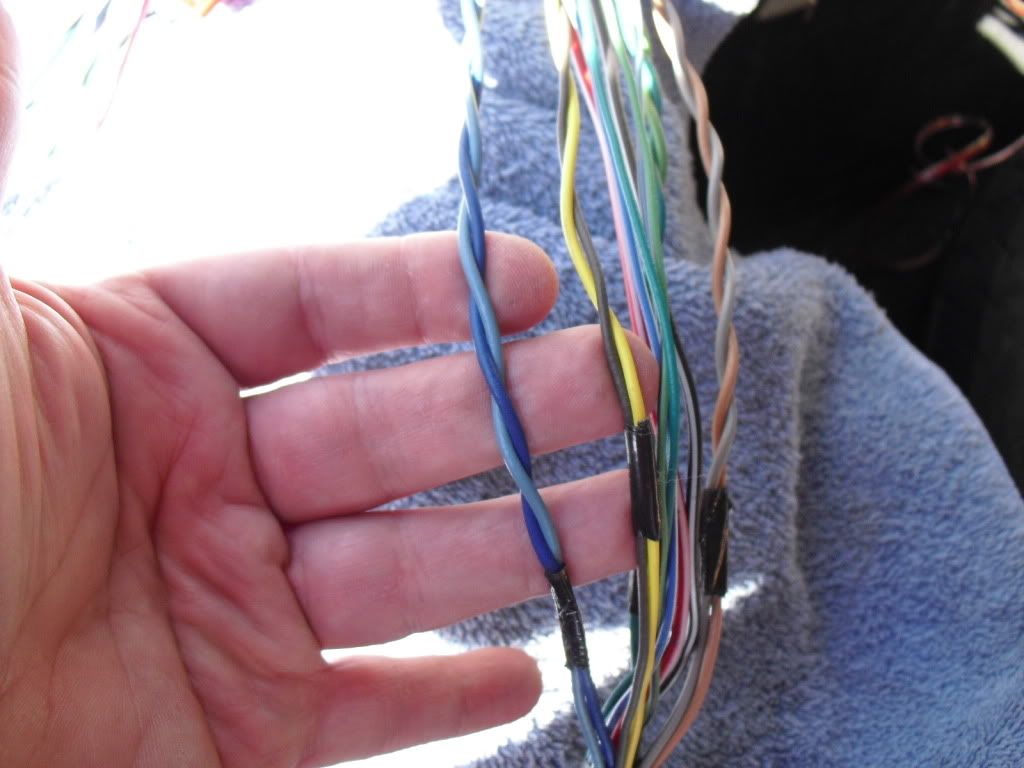
Front speaker wire sets.

Rear speaker wire sets.

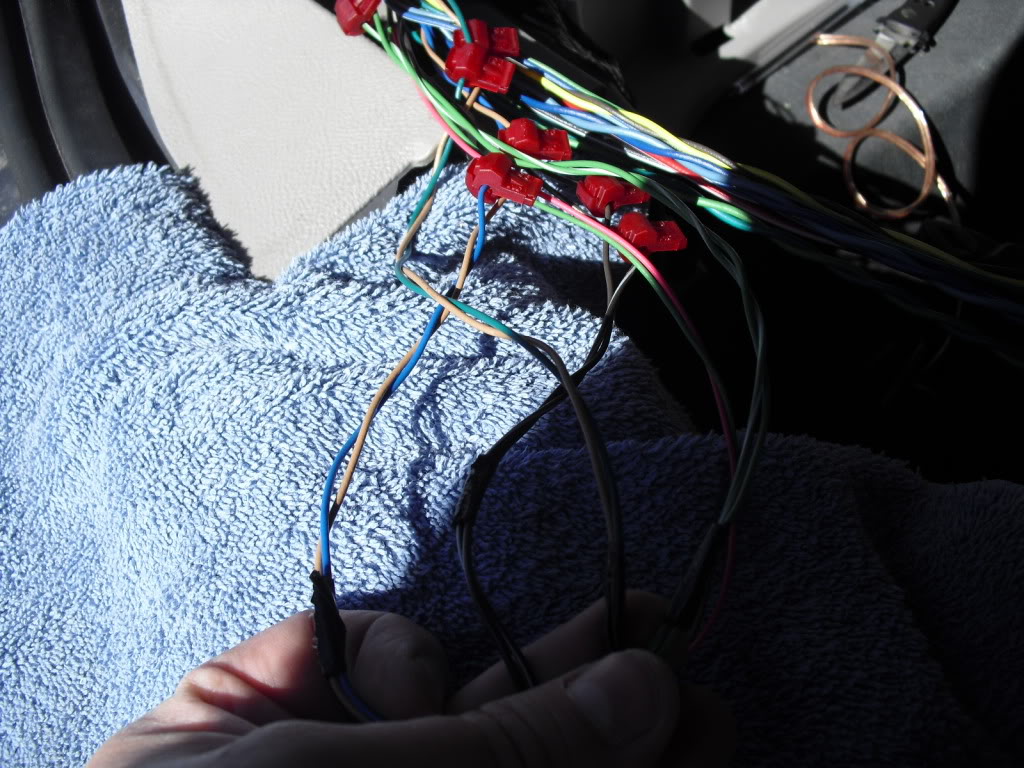
RCA wires and remote on AND extra light green wire can be seen next to pink wire. These two were the only two not paired (taped and twisted) with another wire.
This is all three plug-ins/connecters for the factory amp. The one in my hand is the RCA and remote on plug. The green one has the front and rear speaker wires and the bigger black plug has the pwr, ground, and sub speaker wires.
This one is all wires spread out a bit. Again in my hand are the low level RCA wires TO the amp.
Front speaker wire sets.
Rear speaker wire sets.
RCA wires and remote on AND extra light green wire can be seen next to pink wire. These two were the only two not paired (taped and twisted) with another wire.
09-29-2012, 07:02 PM
#20
Member

Join Date: 09-16-2012
Location: Indianapolis
Posts: 39
Pics of the harness for the amp.
This is all three plug-ins/connecters for the factory amp. The one in my hand is the RCA and remote on plug. The green one has the front and rear speaker wires and the bigger black plug has the pwr, ground, and sub speaker wires.
This one is all wires spread out a bit. Again in my hand are the low level RCA wires TO the amp.
Front speaker wire sets.
Rear speaker wire sets.
RCA wires and remote on AND extra light green wire can be seen next to pink wire. These two were the only two not paired (taped and twisted) with another wire.
I'm thinking about temporarily tapping in until I can get better quality speaker wire than what is locally available. I got all my speakers in and it will be about a month before I can get some sound deaden-er and good wire. Going to have to pull all the panels to deaden any way. Might as well make it a 2 for and bump for now.