
Starting RWD Conversion, Donor Car First
 10-14-2015, 09:56 PM
#1
Member
Thread Starter

Join Date: 03-30-2015
Location: Portland Oegon
Posts: 58
V8,, V6 or 4 Cylinder,, I'm Starting Rear Wheel Drive Conversion, Donor Car First
I too have been pondering on building a Rear Wheel Drive HHR for several years. I've read most all of Lasiter's Posts. He's just about finished with a great build. Thanks again for the Posts and PM
So, now that I have the Time....
My friends are helping Me, We always help each other with our Street Rods builds We are all retired Engineers. We all have & Build Street Rods and We always do our own work We'll be designing the Mechanical portions,, frame, brackets, fitment etc. on Solid Works 3D CAD Software. Yes, We will be leaving the "door Open" for alternate engine, trans and diffy installs.
Designing on the CAD program will provide us with the various frame dimensions and various angles during the build. This is a different approach that most and initially takes a little longer, but this is the way that We work. Plus, We can modify the design much easier for other machinery and all the parts can be reproduced from CAD files.
We will Fabricate a proto frame, then fab a complete frame for my HHR Panel, DD
For my build I'm going to install a Solstice 2.4 Turbo, Aisin AR-5 5 speed manual trans, and IRS diffy. We'll be rebuilding the engine with better than OEM parts and push up the HP a bit. I'm wanting a lighter front end to balance the suspension better. Thinking 300+ hp
For the proto-type build We will preserving as much of the OEM wiring and electronics as possible. This goal is to be able to install a Ecotec engine and trans longitudinally RWD conversion, with the very minimal electronic and wiring mod's. For myself I'm pondering to remove all of the OEM wiring and electronics and do all over. There is just too much electronics in Car's now, it's crazy IMHO. And I'm an Electronic Engineer.
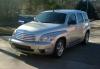
I just got the Donor Car, a HHR Panel. It is a total, but she still runs. I'm in the process of removing the interior working from the rear forward. Up to, but not the Dash or any of the wiring forward.
Next will be to remove the FWD engine & trans. Clean up the mess and get ready to test fit the new engine & trans.
I will try to answer questions related to this RWD Conversion as We progress.
If anyone is complicating or in process on a RWD conversion Chime in or send a PM.
WE should be able to get some progress photos posted by this weekend.
Michael....
So, now that I have the Time....
My friends are helping Me, We always help each other with our Street Rods builds We are all retired Engineers. We all have & Build Street Rods and We always do our own work We'll be designing the Mechanical portions,, frame, brackets, fitment etc. on Solid Works 3D CAD Software. Yes, We will be leaving the "door Open" for alternate engine, trans and diffy installs.
Designing on the CAD program will provide us with the various frame dimensions and various angles during the build. This is a different approach that most and initially takes a little longer, but this is the way that We work. Plus, We can modify the design much easier for other machinery and all the parts can be reproduced from CAD files.
We will Fabricate a proto frame, then fab a complete frame for my HHR Panel, DD
For my build I'm going to install a Solstice 2.4 Turbo, Aisin AR-5 5 speed manual trans, and IRS diffy. We'll be rebuilding the engine with better than OEM parts and push up the HP a bit. I'm wanting a lighter front end to balance the suspension better. Thinking 300+ hp
For the proto-type build We will preserving as much of the OEM wiring and electronics as possible. This goal is to be able to install a Ecotec engine and trans longitudinally RWD conversion, with the very minimal electronic and wiring mod's. For myself I'm pondering to remove all of the OEM wiring and electronics and do all over. There is just too much electronics in Car's now, it's crazy IMHO. And I'm an Electronic Engineer.
I just got the Donor Car, a HHR Panel. It is a total, but she still runs. I'm in the process of removing the interior working from the rear forward. Up to, but not the Dash or any of the wiring forward.
Next will be to remove the FWD engine & trans. Clean up the mess and get ready to test fit the new engine & trans.
I will try to answer questions related to this RWD Conversion as We progress.
If anyone is complicating or in process on a RWD conversion Chime in or send a PM.
WE should be able to get some progress photos posted by this weekend.
Michael....
Last edited by oceangoer; 10-15-2015 at 03:32 PM. Reason: more informative
 10-15-2015, 03:17 AM
#2
Deceased
Join Date: 06-30-2010
Location: Kannapolis NC
Posts: 25,739
10-15-2015, 04:21 PM
#4
Member
Thread Starter
Join Date: 03-30-2015
Location: Portland Oegon
Posts: 58
Gutting the Interior, up to the Dash
The first photo is the progress so far. All of the interior, plastic panels, seats, carpets, console, have been removed. We're keeping the wiring in place for a few more days. We are thinking that marking the floor boards where the wiring is routed and take photos, might be handy later during re-installation..
The second photo is the passenger side of the very rear cargo area. This shows the GPS & Cell Phone module & wiring. Note that the mounting plate is not painted. I'm going to gut these out of my HHR Panel Daily Driver, just more junk that I never use..
The third & forth are the fuel tank connectors. We were extra careful not to damage this connector. The fuel tank will be removed and a new tank installed in very rear of the cargo area. We will probably re-use this connectors and mounting bracket. Unfortunately the fuel tank on this donor is nearly full and needs to be emptied asap...
The next photo #5 is on the drivers side just forward of the console. This area on both sides will need to be widened for the transmission. Getting anxious to find out How Much Cutting. We're planning to fabricate a fiberglass Removable cover.
Photo 6 is a glob of wiring on the rear cargo area on the drivers side. It glued to the top of the head liner. It starts in the front of the car on the floor boards, and is routed to the cargo area, then onto the headliner - ceiling light then forward. The cargo lamp has two magnets to hold it in place....
The interior gutting takes a lot of time. I wore glove as there are a lot of sharp edges everywhere. The seats are bolted with two bolts on the back supports. To remove just lift up the rear of the seat and push forward. And unplug the wiring.. The Carpets need to be folded on the corners to get them under the bracing bar.
Everything seems to have a wiring connector, even two on the seat belts.
More later
 10-15-2015, 08:00 PM
#7
Administrator

Join Date: 10-13-2011
Location: Welland,Ont Canada
Posts: 37,609
This is when I would triple up the spot welds at any point I could on the unibody, to stiffen it up, it helps a lot in a rally car, dirt or pavement oval racer or even my old Buick Regal drag car from the mid eighties!
10-15-2015, 11:42 PM
#8
Deceased
Join Date: 06-30-2010
Location: Kannapolis NC
Posts: 25,739
OK, just because I run this joint, I'm still Human...and I just plain missed that, sorry oceangoer.

And if you think that's scatterbrained, just wait until the saga of my next Sprain, Strain, Fracture, Laceration...umm...otherwise known here as a "Oh no, Mike started another Home Improvement Project!!"
