
How to install an HHR spoiler


 09-27-2010 | 10:03 PM
#25

New Member
Joined: 03-01-2010
Posts: 11
From: Canada
Hi,
Forgive me for being very late with my pictures �Supermode�! Find some before/after pictures of the spoiler I installed with my father (I just had to asked him for a little help! 75 and still rocking ). In the second picture I hope you can notice the difference in the Tint color I have written about earlier in this thread. It�s not that bad. In a way, I find it �linear� in colour with the windows deflectors along with my hood deflector (no picture).
So beware when buying the spoiler through the Internet. It may or may not match perfectly your HHR body Chevy color.
Thanks to all!
P.s great forum!
Rej
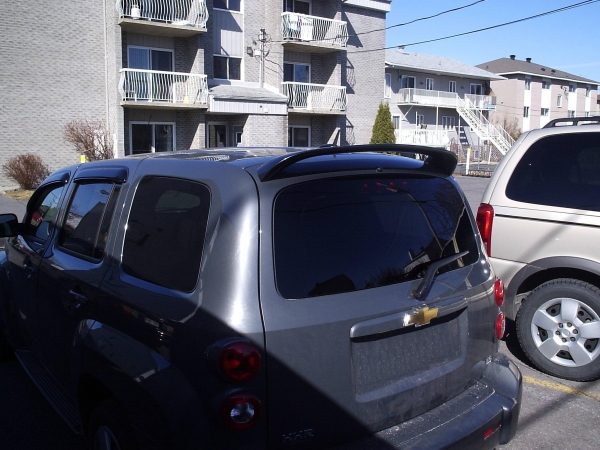
Forgive me for being very late with my pictures �Supermode�! Find some before/after pictures of the spoiler I installed with my father (I just had to asked him for a little help! 75 and still rocking
). In the second picture I hope you can notice the difference in the Tint color I have written about earlier in this thread. It�s not that bad. In a way, I find it �linear� in colour with the windows deflectors along with my hood deflector (no picture). So beware when buying the spoiler through the Internet. It may or may not match perfectly your HHR body Chevy color.
Thanks to all!
P.s great forum!
Rej
10-02-2010 | 02:25 PM
#26

Member
Joined: 09-01-2010
Posts: 33
From: TEXAS
rear spoiler install
I also wish to thank Supermode for his instructions! I also got my spoiler from wing king. They have changed the hardware package a little they are now sending hex head bolts with the kit! I had to use a 7/16 bit on the 2 holes in the back side to clear the Hex heads! I used the 3/4 inch spaceing on the top of the spoiler and it worked out great!

 09-16-2011 | 09:54 AM
#29

Joined: 09-13-2011
Posts: 1
From: Iowa
I would like to thank everyone and especially Supermode for all the great information. I purchased a spoiler from WingKing and it arrived yesterday. The color match (Black Granite Metallic) was perfect and there were no flaws that I could see in the workmanship. One difference I could see from the pictures is that the spoiler is now shipped with hex head bolts, which at first glance, I thought it could be tricky to install with a socket but on top on the bolt is grooves for a phillips screw driver. From other recommendations, I installed it �� down from the top edge of the door and �� on the sides. This made the existing hole on the bottom side line up perfectly. I then had to enlarge the drilled hole with a �� bit to fit the head of the bolt. I then used some color matched paint to cover the raw areas created from the drilling. Next was to put on the foam spacers, which was pretty straight forward by removing the paper backing and lining it up on the foot area of the spoiler. After vacuuming all the shavings and fully wiping down the area, I bolted the spoiler on. What a change and great look it made! I took my time and the whole process was just over an hour. One recommendation is to spend most of your time on measuring and lining up the spoiler. Double and triple check this as you can only drill once. Kinda scary. I�m extremely happy with the look and glad that everyone here gave their input to help.