
3 bar grille mod [ongoing progress]

 10-29-2012 | 10:38 PM
#44

Thread Starter
Senior Member
Joined: 12-04-2011
Posts: 374
From: El Paso, TX
Oh, FYI: when I went to Lowe's tonight to get more Plastic Bonder, they didn't have it on the shelf, in fact there wasn't even a hanger allocated for it. They did have some still in stock, boxed up on top of the shelf where they keep the overstock. Apparently they're not going to carry it for much longer. I got 6 more tubes, hopefully that and the one I had left will get me though this stage.
I can't say enough about how well this product feathers. When filed smooth, the transition between materials is simply not detectable by touch. I just wish it was opaque so I could see the surface better.
I can't say enough about how well this product feathers. When filed smooth, the transition between materials is simply not detectable by touch. I just wish it was opaque so I could see the surface better.
11-03-2012 | 01:02 PM
#45
Thread Starter
Senior Member
Joined: 12-04-2011
Posts: 374
From: El Paso, TX
Yesterday I set up the mold forms for the upper gaps, and just finished filling them:
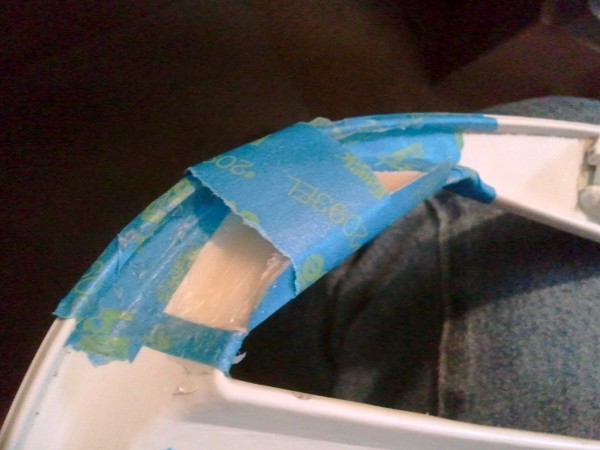
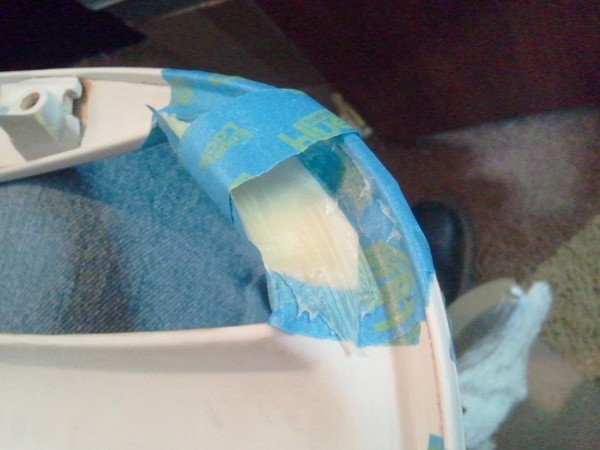
I used the same process with foil and tape again. These will require more finish work because the desired final surface is a compound curve. I traced the curve of the rim to use as a guide for the inside edge.
Taping around the work areas makes for less clean up work :)
I also skimmed over the lower fills (front, and on the back to add some thickness) so they can be finished.
11-11-2012 | 12:28 AM
#46

Senior Member
Joined: 09-19-2012
Posts: 70
From: North Glendale, AZ
Do you have the bars that you cut out of your Grille? I am doing a project and if you have them I would be interested in getting them (or one) from you.
Anyone have an old or broken Grille the want to get rid of? Yes I'll pay ya for it.
Anyone have an old or broken Grille the want to get rid of? Yes I'll pay ya for it.
11-11-2012 | 12:08 PM
#47
Thread Starter
Senior Member
Joined: 12-04-2011
Posts: 374
From: El Paso, TX
11-24-2012 | 07:17 PM
#49
Thread Starter
Senior Member
Joined: 12-04-2011
Posts: 374
From: El Paso, TX
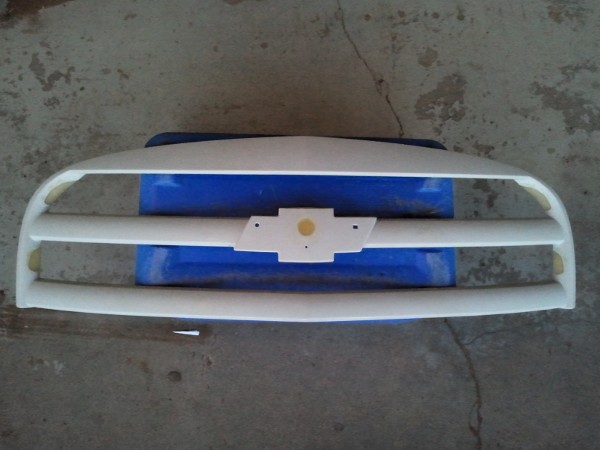
Getting there.
I've made good progress since my last post. After the initial spanning of the upper gaps, I thickened them on the backside to better approximate the curve (sorry, didn't take pics of that). Then I glazed over the front side of the upper gaps and the surrounding original material to prepare for getting a smooth transition.
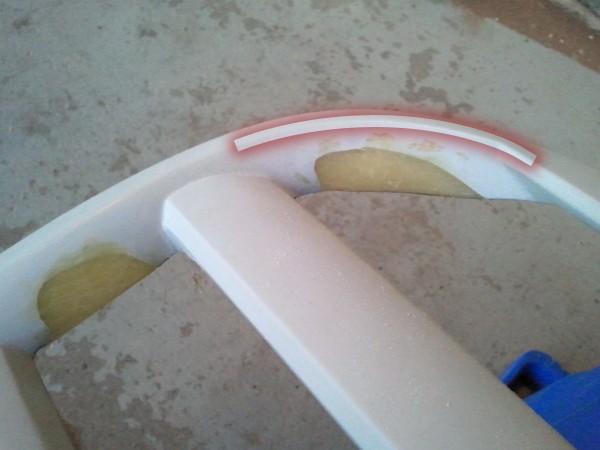
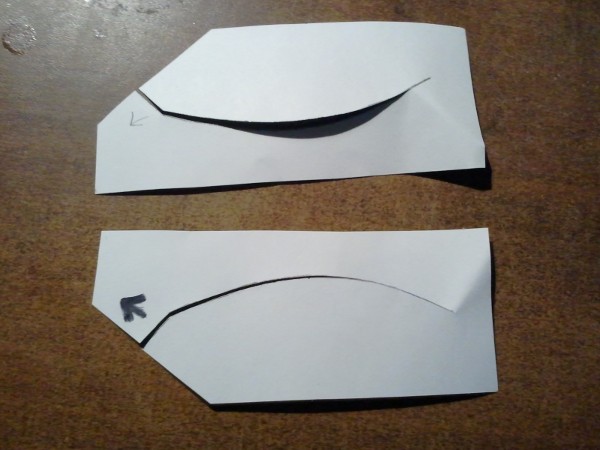
I made some templates of the forward edge (highlighted below) as guides for creating the gap edges:
The templates (paper backed with painter's tape):
Here's what it looks like now:
With the backfill and glazing done, I traced the edge of the template onto the Loctite with a sharpie. With the top-to-side transition point placed at the top of the gap, the curve hits the bottom of the gape nicely. Then I ground it down to the line and did some rough contouring with my Dremel. Most of the original span material is gone, but the backfill remains.
Detail shots (the sharpie ink is still there):
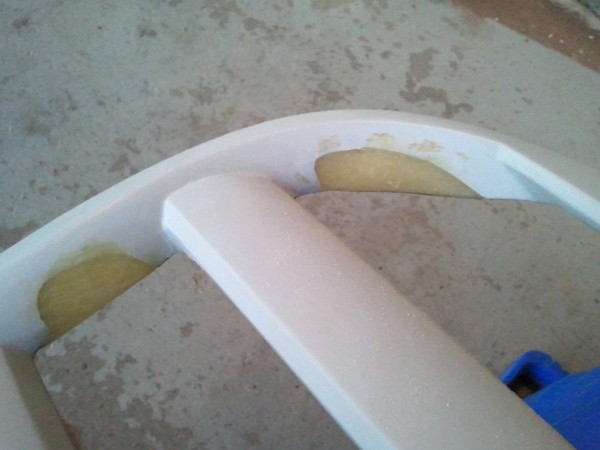
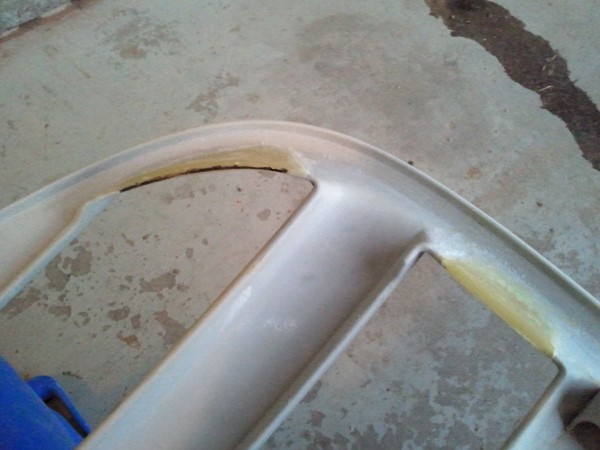
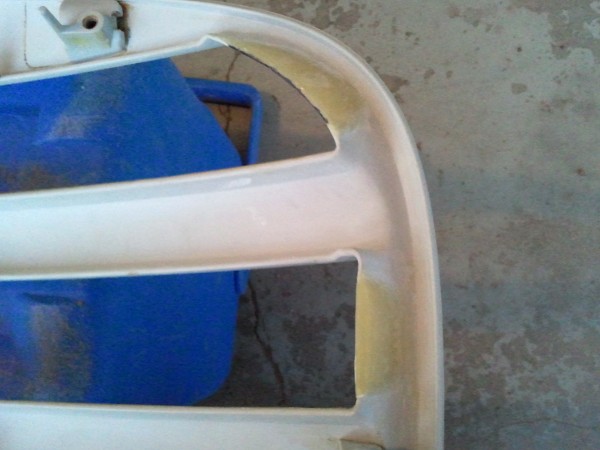
The brown stains on the front are residue from the electroplating bath, they're sealed under Loctite now.
I'm going to glaze over the fronts again because there are a couple spots that are too low. Then I'll work out the final edges, which aren't straight right now.
I've made good progress since my last post. After the initial spanning of the upper gaps, I thickened them on the backside to better approximate the curve (sorry, didn't take pics of that). Then I glazed over the front side of the upper gaps and the surrounding original material to prepare for getting a smooth transition.
I made some templates of the forward edge (highlighted below) as guides for creating the gap edges:
The templates (paper backed with painter's tape):
Here's what it looks like now:
With the backfill and glazing done, I traced the edge of the template onto the Loctite with a sharpie. With the top-to-side transition point placed at the top of the gap, the curve hits the bottom of the gape nicely. Then I ground it down to the line and did some rough contouring with my Dremel. Most of the original span material is gone, but the backfill remains.
Detail shots (the sharpie ink is still there):
The brown stains on the front are residue from the electroplating bath, they're sealed under Loctite now.
I'm going to glaze over the fronts again because there are a couple spots that are too low. Then I'll work out the final edges, which aren't straight right now.
