
Slide_Rite's HHR - Pics, Mods & More!
 08-12-2014, 12:12 AM
#91
Senior Member
Thread Starter

Join Date: 03-20-2012
Location: Dallas, TX
Posts: 292
Thing's clean. Have you thought about doing anything with the black plastic in the front bumper? I sanded smooth and painted mine body color. I think it looks infinitely better, even on my darker color. I can imagine it would make a world of difference on yours. Or even "Copper'ed out" like your grille and mirrors.
 08-27-2014, 10:21 PM
#93
Senior Member
Thread Starter
Join Date: 03-20-2012
Location: Dallas, TX
Posts: 292
OR...if you want to spend the extra dough (roughly 2 bills)...you can get a set custom made from Cutworm Specialties. After all is said & done...I'll be switching to a set of these, which can be found & ordered HERE - One Piece Spike Lugs.
08-28-2014, 11:13 AM
#94
Member

Join Date: 06-12-2007
Location: San Antonio, TX
Posts: 71
The ones I have now are just plastic covers that I dipped black. You can get them HERE
OR...if you want to spend the extra dough (roughly 2 bills)...you can get a set custom made from Cutworm Specialties. After all is said & done...I'll be switching to a set of these, which can be found & ordered HERE - One Piece Spike Lugs.
OR...if you want to spend the extra dough (roughly 2 bills)...you can get a set custom made from Cutworm Specialties. After all is said & done...I'll be switching to a set of these, which can be found & ordered HERE - One Piece Spike Lugs.
08-30-2014, 12:26 AM
#96
Senior Member
Thread Starter
Join Date: 03-20-2012
Location: Dallas, TX
Posts: 292
Zombie Pinup Babe & My HHR!!
This is my custom drawing from zombie illustrator Rob Sacchetto. I participated in a fundraiser & got to submit my custom artwork request. So I requested a Zombie Pinup with my HHR & sent him a pic of my ride for reference. Came out pretty darn awesome...should have the original soon, gonna frame it & stick on the wall of my garage. 
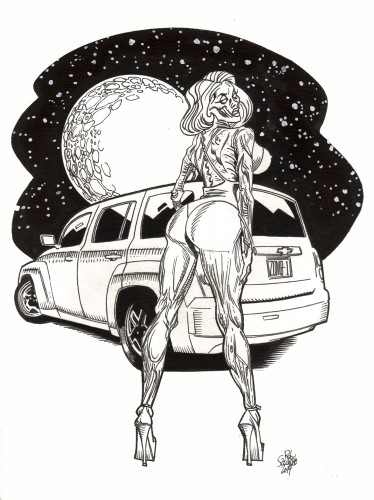
Oh, for those who don't know...I <3 Zombies.
Oh, for those who don't know...I <3 Zombies.
 09-01-2014, 12:18 AM
#98
Senior Member
Thread Starter
Join Date: 03-20-2012
Location: Dallas, TX
Posts: 292
02-15-2015, 10:19 PM
#99
Senior Member
Thread Starter
Join Date: 03-20-2012
Location: Dallas, TX
Posts: 292
My ears could take no more...
I finally decided I could no longer handle listening to the rattle of my blown front passenger speaker. By no means am I an audiophile, but I do love my music. With an upcoming road trip of 14+ hours...I decided a partial audio upgrade was a prerequisite.
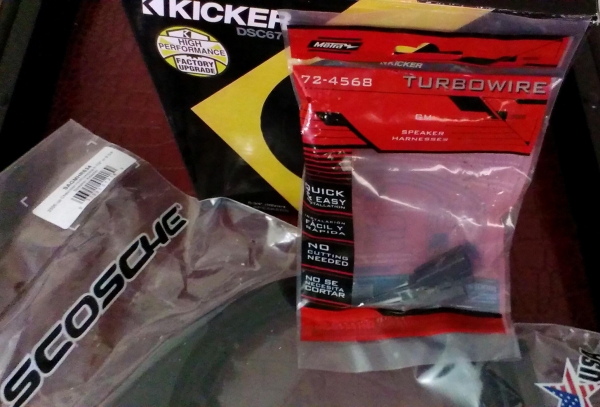
I decided to go through Crutchfield & looked up what would fit the HHR. The great thing is they include the wiring harnesses to hookup the speakers with no splicing. The problem is, the speaker adapters they include for free with purchase are for a Jeep...and require drilling to get them to work (and they probably still don't work as well as the correct intended adapters). After some research I found that several models use the same adapters & harnesses that I needed. I changed the vehicle selection to a 2011 Chevy Silverado & placed my order.
My order arrived nicely packed in plenty of packaging peanuts & everything was in perfect shape! It contained the correct adapters (SAGMHR634) & harnesses (Metra 72-4568)...woot-woot!!
So again, if you plan to purchase from Crutchfield; place your order for a 2011 Chevy Silverado & you will get the correct adapters & harnesses.
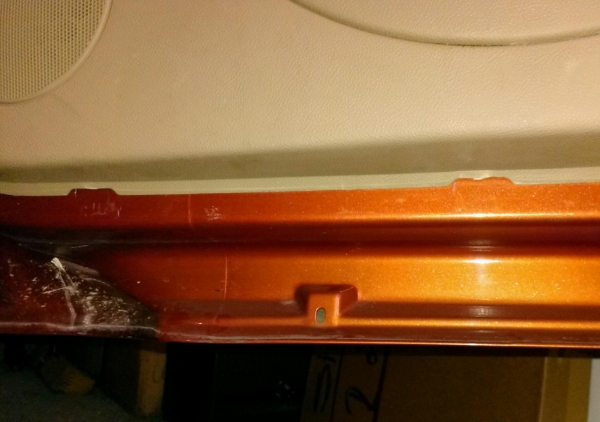
I busted out my handy panel removal tool & got started.

The tool I have fits perfectly in these openings, and makes popping off the panels a breeze.
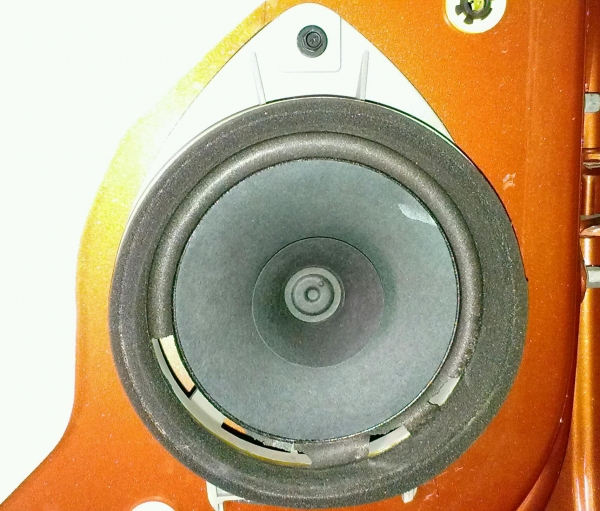
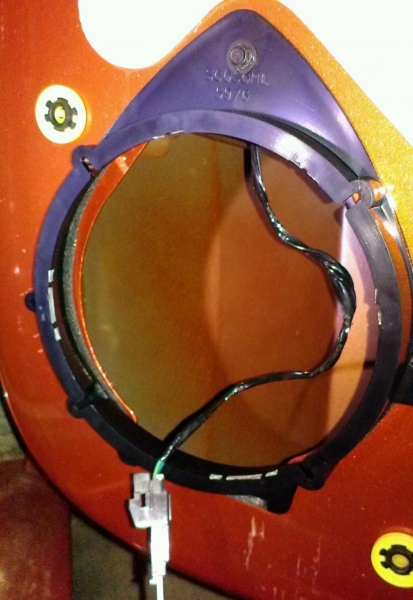
Once I had the panels off, I could see just how bad the speakers had gotten...and why that one was rattling so much.
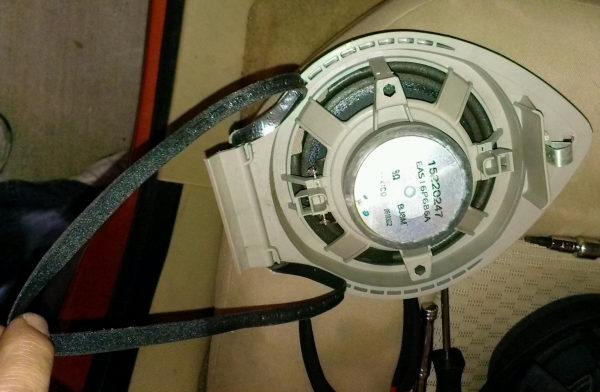
This one is actually my rear drivers side speaker, but it wasn't working at all...so it got replaced by the drivers front stock speaker (for now), since it was still in decent shape (no deteriorated foam surround or holes).
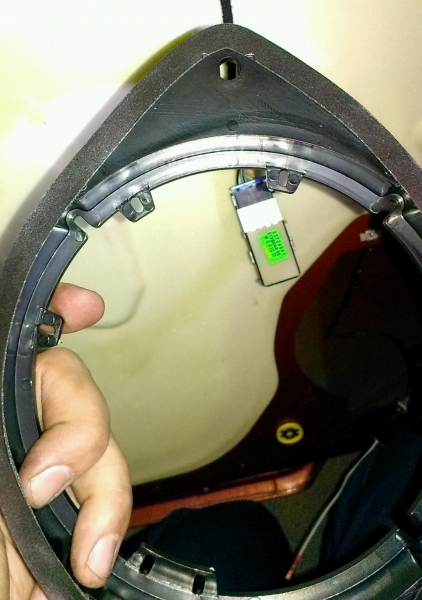
So I pulled out the stock speakers & removed the adhesive backed foam to transplant to the new speaker adapters.
Next, I had to snap off the inner tabs to make room for the 6 3/4 speakers to fit into the adapters. They break off easily with needle nose pliers.
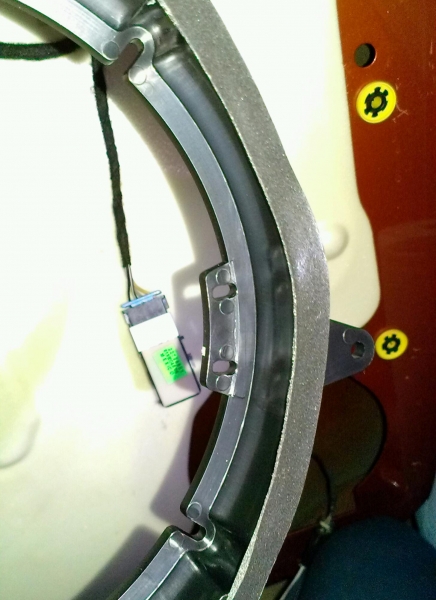
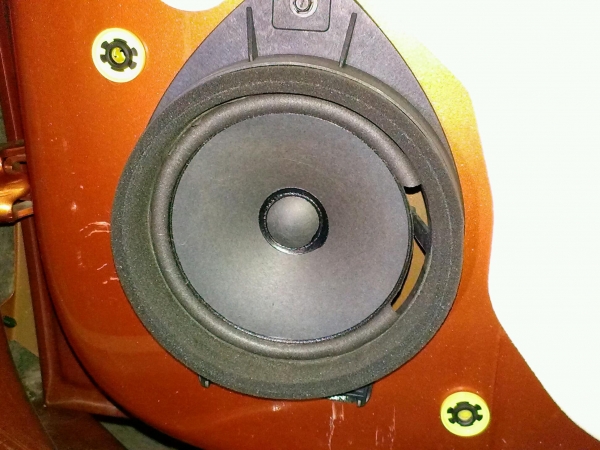
Adapters fitted with the foam gasket, inner tabs removed, and with Metra harnesses connected. I only screwed them down with the single screw that the stock adapters use, however there are two additional mounting points that can be utilized if desired.
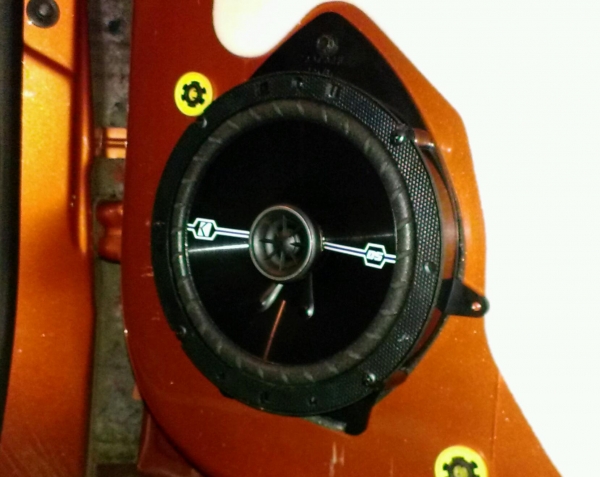
Speakers mounted & ready to put the panels back on.
In the future I plan to buy a 6 3/4 component set to go up front & these will get moved to the rear. For now, it will suffice & make our listening experience on our drive to Colorado 100% more enjoyable. They sound pretty good & I imagine that they will sound even better once I get the chance to swap out the head unit.
I decided to go through Crutchfield & looked up what would fit the HHR. The great thing is they include the wiring harnesses to hookup the speakers with no splicing. The problem is, the speaker adapters they include for free with purchase are for a Jeep...and require drilling to get them to work (and they probably still don't work as well as the correct intended adapters). After some research I found that several models use the same adapters & harnesses that I needed. I changed the vehicle selection to a 2011 Chevy Silverado & placed my order.
My order arrived nicely packed in plenty of packaging peanuts & everything was in perfect shape! It contained the correct adapters (SAGMHR634) & harnesses (Metra 72-4568)...woot-woot!!
So again, if you plan to purchase from Crutchfield; place your order for a 2011 Chevy Silverado & you will get the correct adapters & harnesses.
I busted out my handy panel removal tool & got started.
The tool I have fits perfectly in these openings, and makes popping off the panels a breeze.
Once I had the panels off, I could see just how bad the speakers had gotten...and why that one was rattling so much.
This one is actually my rear drivers side speaker, but it wasn't working at all...so it got replaced by the drivers front stock speaker (for now), since it was still in decent shape (no deteriorated foam surround or holes).
So I pulled out the stock speakers & removed the adhesive backed foam to transplant to the new speaker adapters.
Next, I had to snap off the inner tabs to make room for the 6 3/4 speakers to fit into the adapters. They break off easily with needle nose pliers.
Adapters fitted with the foam gasket, inner tabs removed, and with Metra harnesses connected. I only screwed them down with the single screw that the stock adapters use, however there are two additional mounting points that can be utilized if desired.
Speakers mounted & ready to put the panels back on.
In the future I plan to buy a 6 3/4 component set to go up front & these will get moved to the rear. For now, it will suffice & make our listening experience on our drive to Colorado 100% more enjoyable. They sound pretty good & I imagine that they will sound even better once I get the chance to swap out the head unit.
Last edited by Slide_Rite; 03-01-2015 at 09:03 PM.
03-01-2015, 09:50 PM
#100
Senior Member
Thread Starter
Join Date: 03-20-2012
Location: Dallas, TX
Posts: 292
Repair before vacation & a few trip pics...
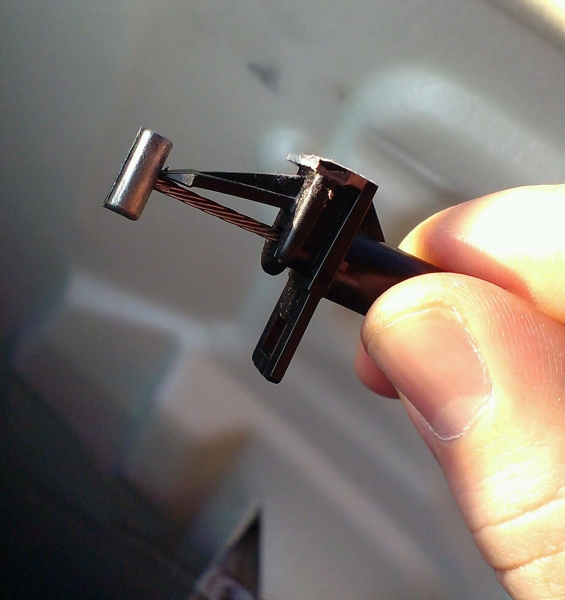
Recently when I replaced my blown speakers, I must have cracked the plastic clip on the door latch release cable. My girlfriend tried to open it & there was no tension on the handle. I took the panel back off & a piece of plastic fell out. It was to the clip on the end of the release cable....just as suspected.
I had to fix it before vacation & hope it would hold up. Thankfully, it has so far...this was my fix until I can get another cable from my local pick n pull.
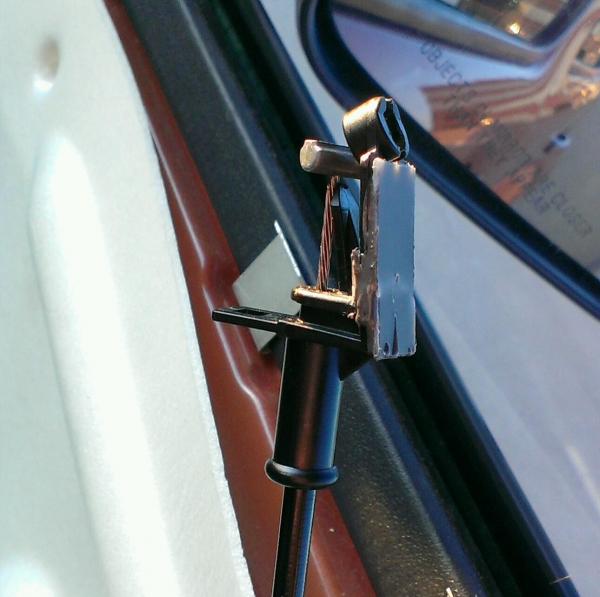
This is the broken plastic clip...
Broken plastic with reinforcement plastic.
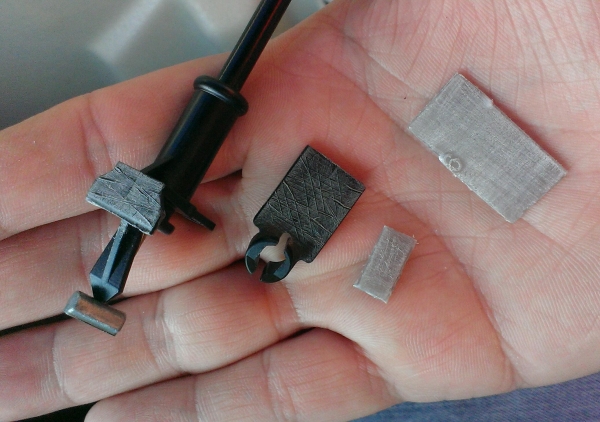
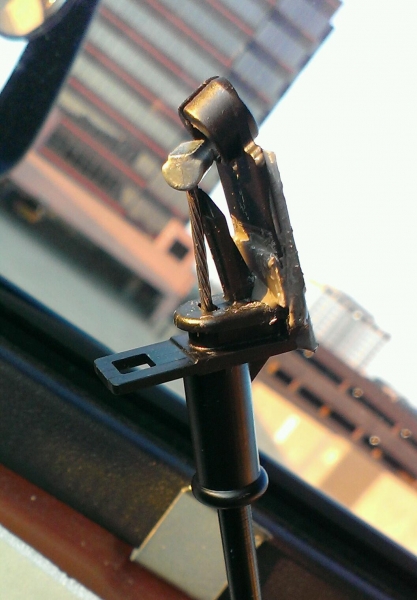
Used JB Weld & some flexible plastic that I cut from a cap as reinforcement pieces.
Once it dried, it was put back into the handle & has held up nicely through sub-freezing temps and plenty of use while on vacation.
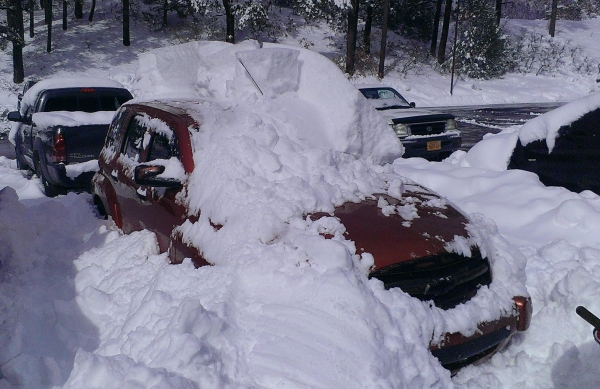
While on vacation, I got an opportunity for a few cool shots of my truck practically buried in falling snow...
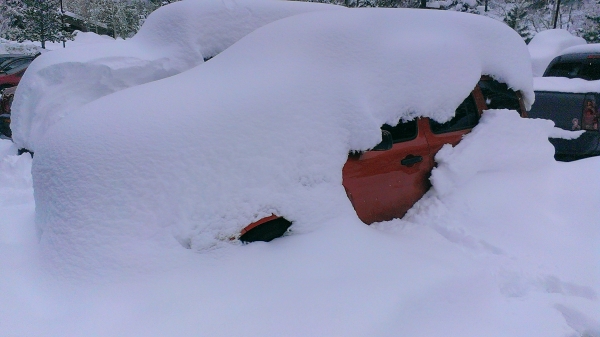
Digging her out...

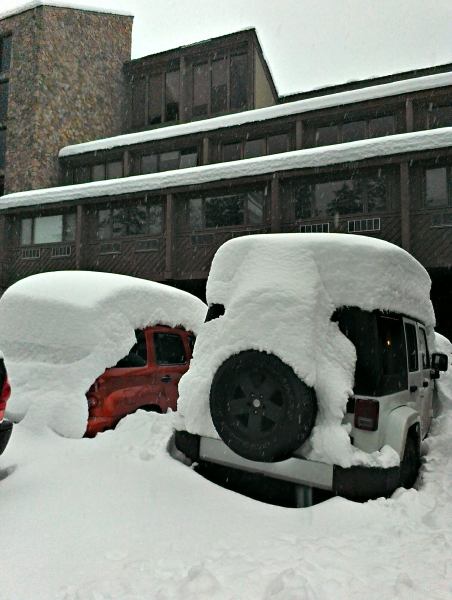
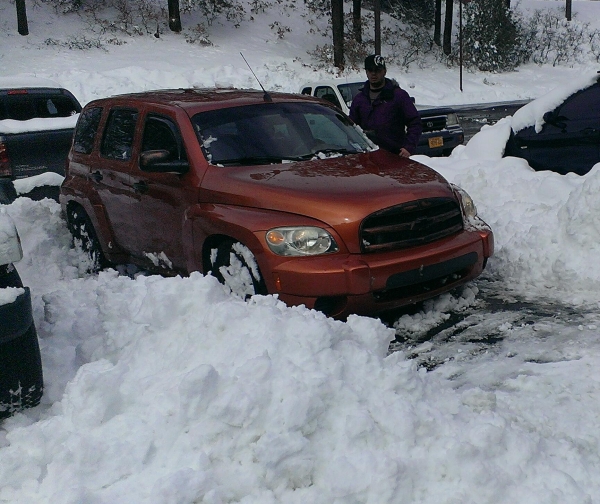
Finally, she is out!
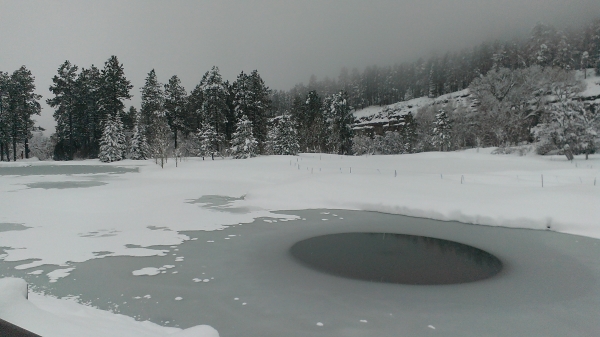
It was definitely a winter wonderland up in the mountains, great scenery in every direction.
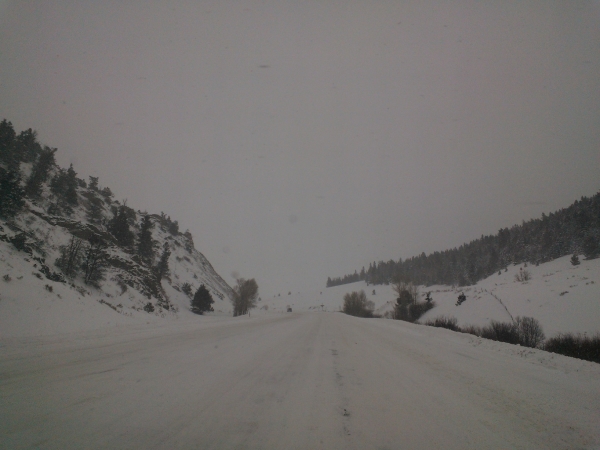
...but some of the road conditions were questionable, at least for us...hahaha!
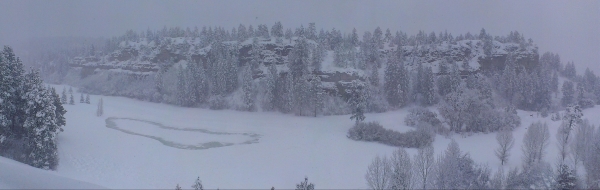
The storms were worth it, the snow was super deep powder & the snowboarding was awesome. Way up in the clouds.

I had to fix it before vacation & hope it would hold up. Thankfully, it has so far...this was my fix until I can get another cable from my local pick n pull.
This is the broken plastic clip...
Broken plastic with reinforcement plastic.
Used JB Weld & some flexible plastic that I cut from a cap as reinforcement pieces.
Once it dried, it was put back into the handle & has held up nicely through sub-freezing temps and plenty of use while on vacation.
While on vacation, I got an opportunity for a few cool shots of my truck practically buried in falling snow...
Digging her out...
Finally, she is out!
It was definitely a winter wonderland up in the mountains, great scenery in every direction.
...but some of the road conditions were questionable, at least for us...hahaha!
The storms were worth it, the snow was super deep powder & the snowboarding was awesome. Way up in the clouds.
Last edited by Slide_Rite; 03-01-2015 at 11:16 PM.